

Product Modifier allows merchants to offer customization options for a product during checkout. It is useful for products that require customer preferences, such as sugar level, ice level, size, flavor, spicy level, toppings, or other special selections.
Modifier groups are reusable, which means you can create one modifier group and attach it to multiple products. This helps keep your product setup clean and easier to manage.
When to use Product Modifier #
Use Product Modifier when:
- Customers need to customise the product before checkout.
- The same option can be reused across multiple products.
- You want to avoid creating too many duplicate products.
- You need to add extra charges for certain options.
To set up a Product Modifier, follow these two steps:
- Step 1: Create a Modifier Group
- Step 2: Assign the Modifier Group to a Product
Step 1: Create a Modifier Group #
A modifier group is a reusable set of choices that can be attached to one or more products.
To set it up, go to Product > Modifier Groups, then click + Add Modifier Group.
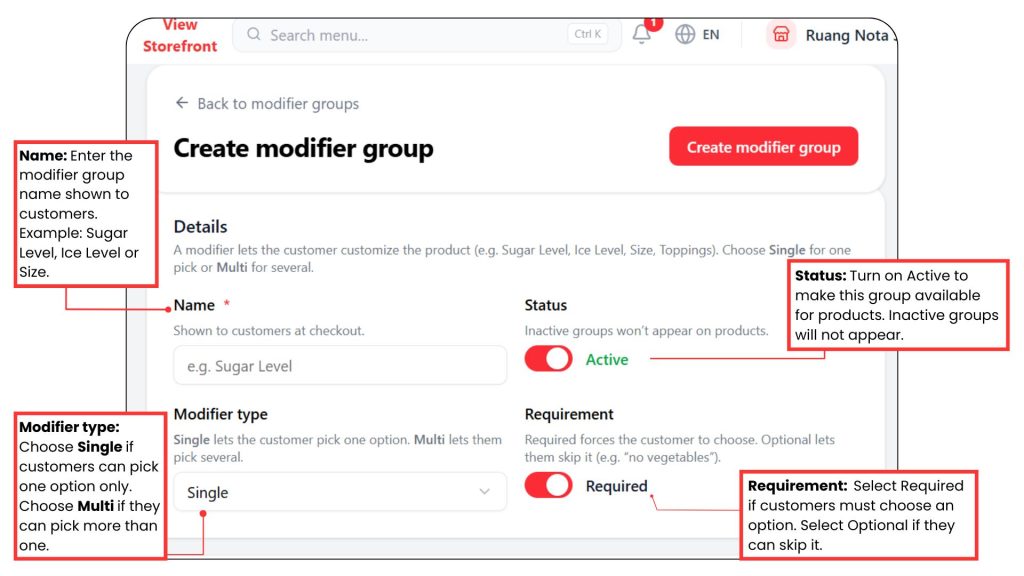
Then continue with the Options. Options allow you to add the choices that customers can select during checkout
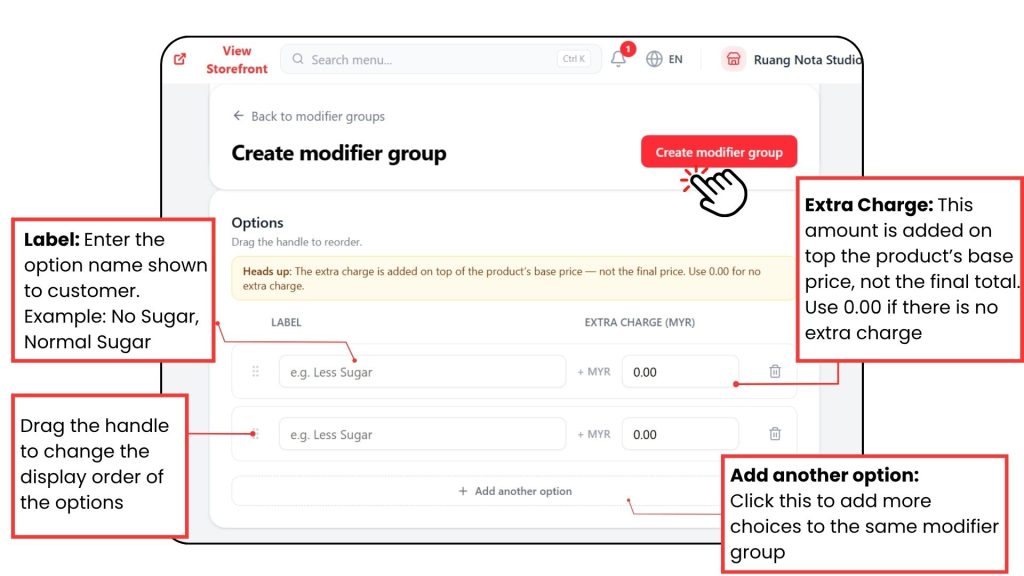
After adding all options, click Create modifier group to save.
Now let’s assign the modifier group to a product.
Step 2: Assign the Modifier Group to a Product #
After creating the modifier group, go to the product that you want to apply it to.
Under Product Modifier, select the modifier group from the Modifier Groups dropdown.
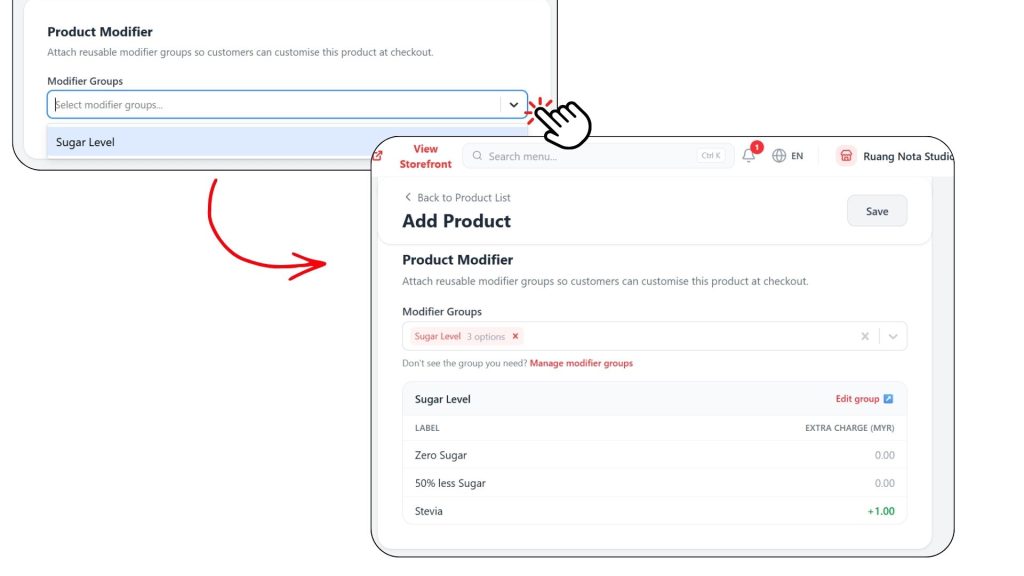
Once selected, the modifier group will appear below the dropdown. You can review the options and extra charges before saving the product.
Click Save to apply the modifier group to the product.
Note: Modifier groups are reusable. You can assign the same modifier group to any product that uses the same options.