

Adding a product is one of the first steps to start selling in your online store. In this guide, you will learn how to create a new product, add the important product information, and make sure the product is ready for customers to view and purchase.
STEP 1: Product Details #
Start by adding the basic information that defines your product. This section helps customers understand what the product is, where it belongs, and what details they need to know before purchasing.
To get started go to > Product > click +Add Product
Then, fill in the product details as shown below:
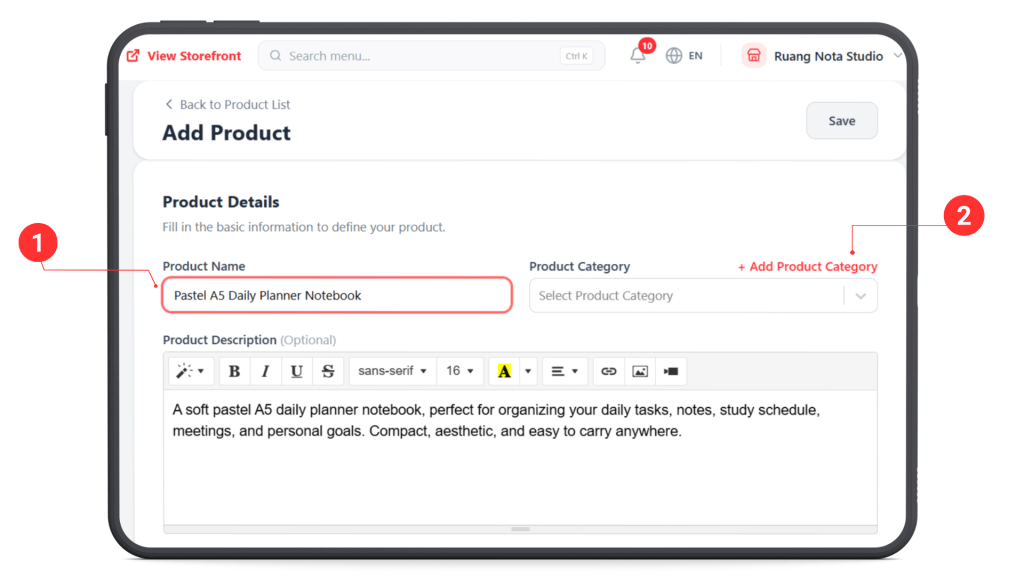
(1) Enter Product Name: Enter a clear product name so customers can easily understand what you are selling.
(2) Add Product Category: Click + Add Product Category if the product category has not been created yet.
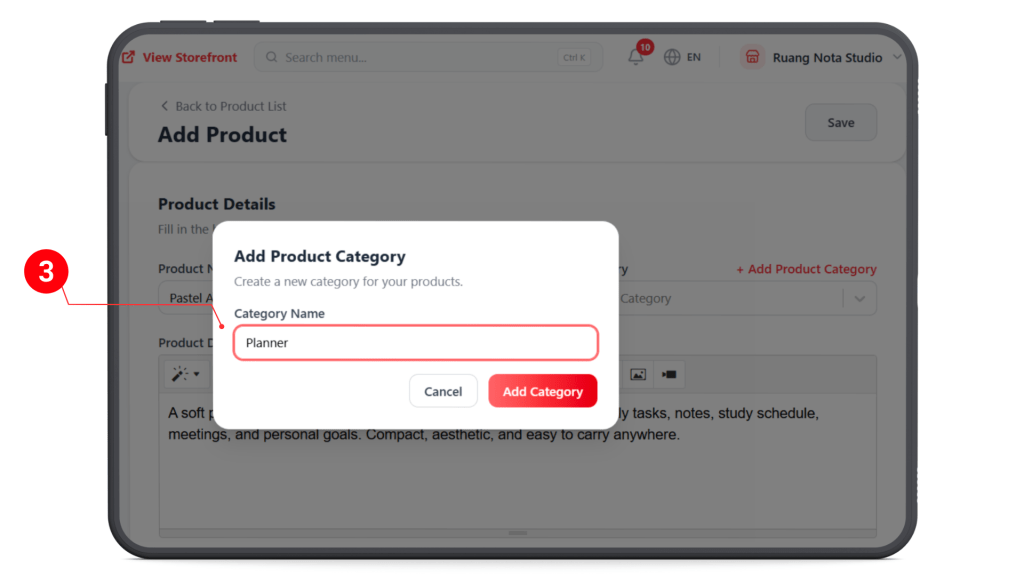
(3) Create Category Name: Enter the category name in the pop-up box, then click Add Category.
Important: Category will helps you organize your products properly, so customers can browse your store more easily.
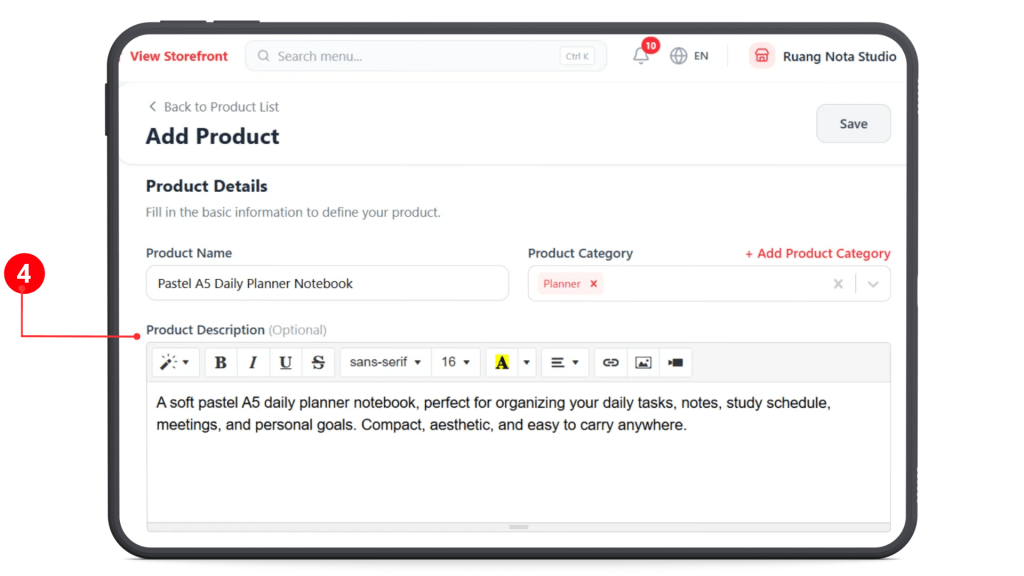
(4) Add Product Description: Write a short product description to explain the product details, usage, and benefits. This helps customers understand the product before purchasing.
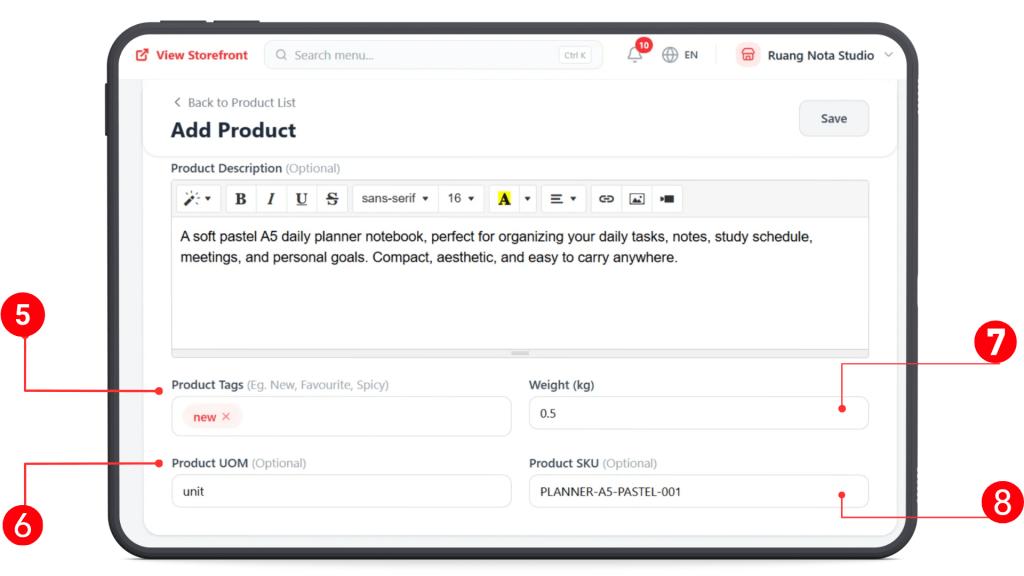
(5) Product Tags: Add relevant tags to describe or highlight the product, such as New, Favourite, or Best Seller.
(6) Product UOM: Enter the unit of measurement for the product, such as Unit, Package, Bottle, or Item.
(7) Weight (kg): Fill in the product weight in kilograms. This helps the system calculate shipping fees accurately.
(8) Product SKU: Enter the product SKU code, if available. This helps with product tracking and inventory management for internal reference
STEP 2: Product Images
#
Upload Product Default Photo #
Upload clear product photos so customers can better view your product before placing an order.
You can upload the main product photo first. This image will be shown as the main photo for your product.
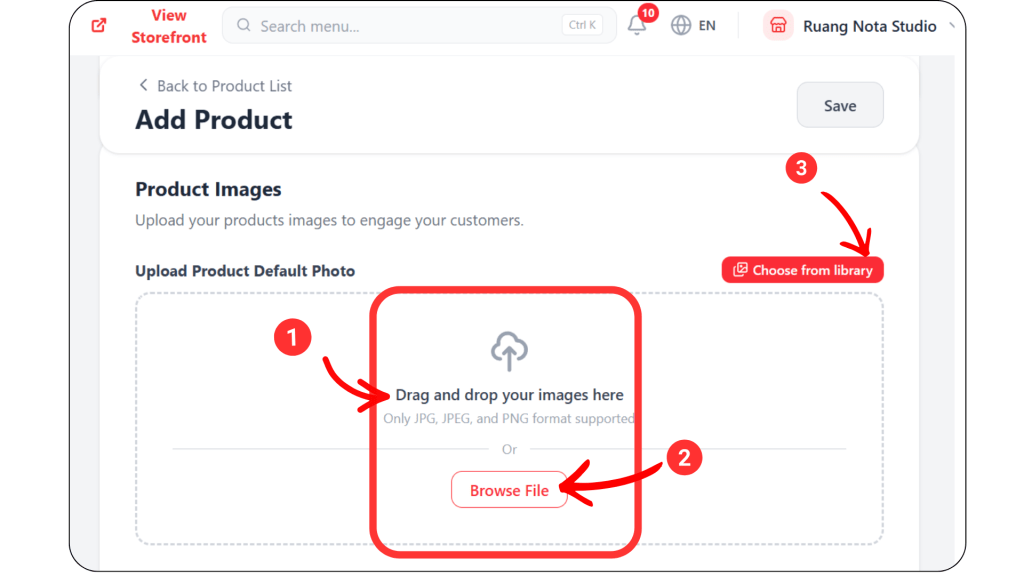
To upload, you can either:
(1)Drag and drop your image into the upload box.
(2) Click Browse File and choose the image from your device.
(3) Click Choose from Library if you want to use an existing image from your media library.
Product Gallery #
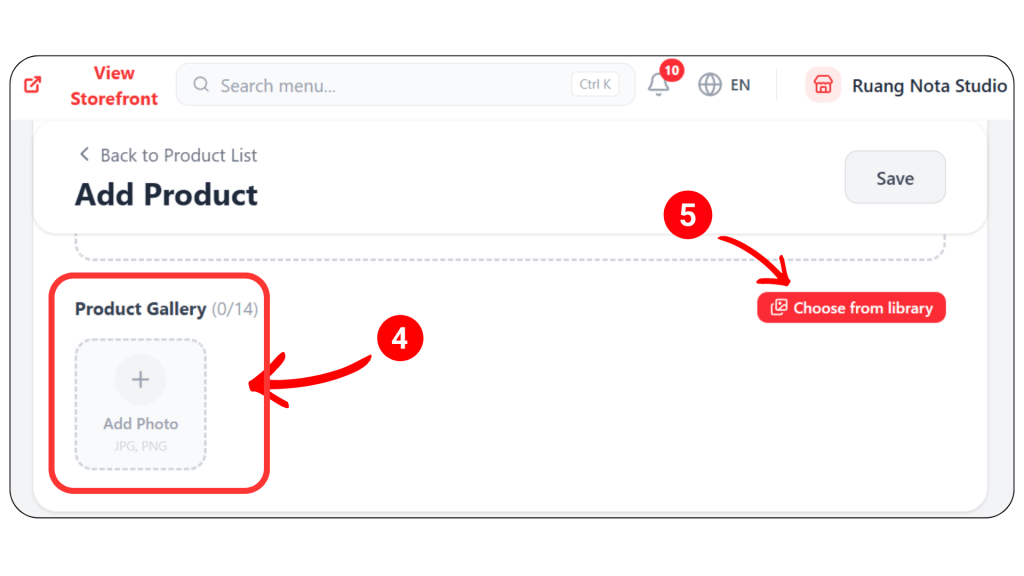
(4) Click Add Photo to upload additional product images into the product gallery.
(5) Click Choose from Library to select existing images for the product gallery.
You can upload up to 14 images in the Product Gallery. Customers can click the photos to preview them.
STEP 3: Product Video
#
Upload Product Video #
You can upload a video to showcase your product.
This is useful if you want to show:
- How the product looks in real life
- How to use the product
- Product demo
- Product packaging
- Before and after example
- Customer experience video
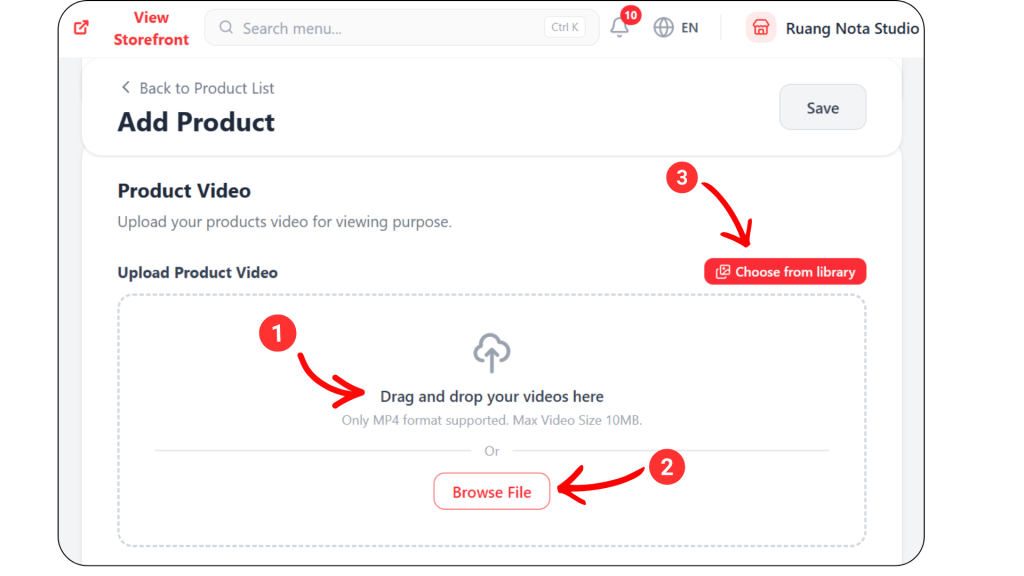
(1) Drag and drop your product video into the upload box.
(2) Click Browse File to select a video from your device.
(3) Click Choose from Library if you want to use an existing video from your media library.
Upload Product Video Thumbnail #
After uploading a video, you can upload a thumbnail or cover photo for the video.
This image will act as the preview image before customers play the video.
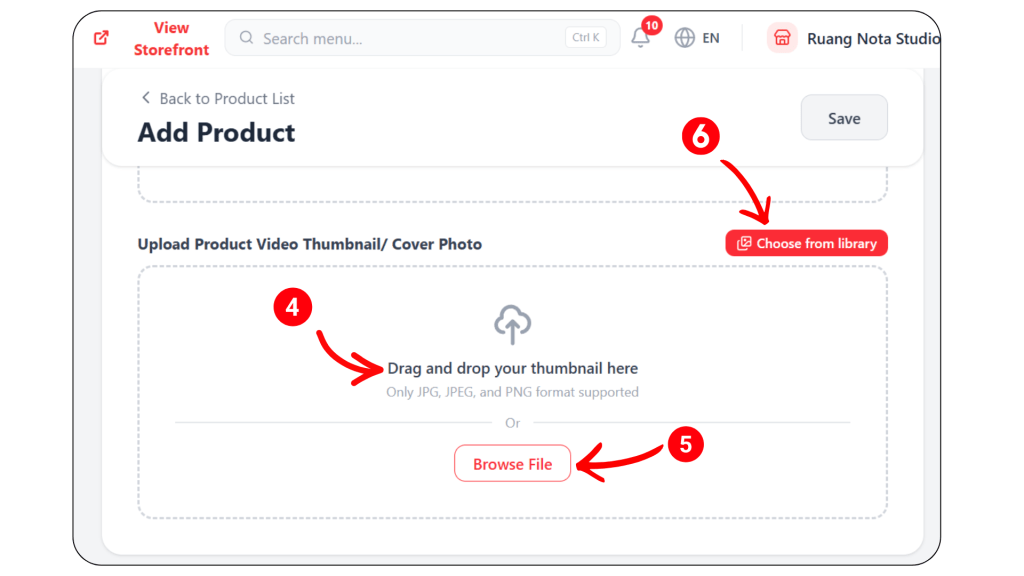
(4) Click Browse File to select a thumbnail image from your device.
(5) Click Browse File to select a thumbnail image from your device.
(6) Click Choose from Library if you want to use an existing thumbnail or cover photo from your media library.
If you do not have a product video yet, you may skip this step first.
Step 4: Pricing #
In the Pricing section, enter your product selling or retail price
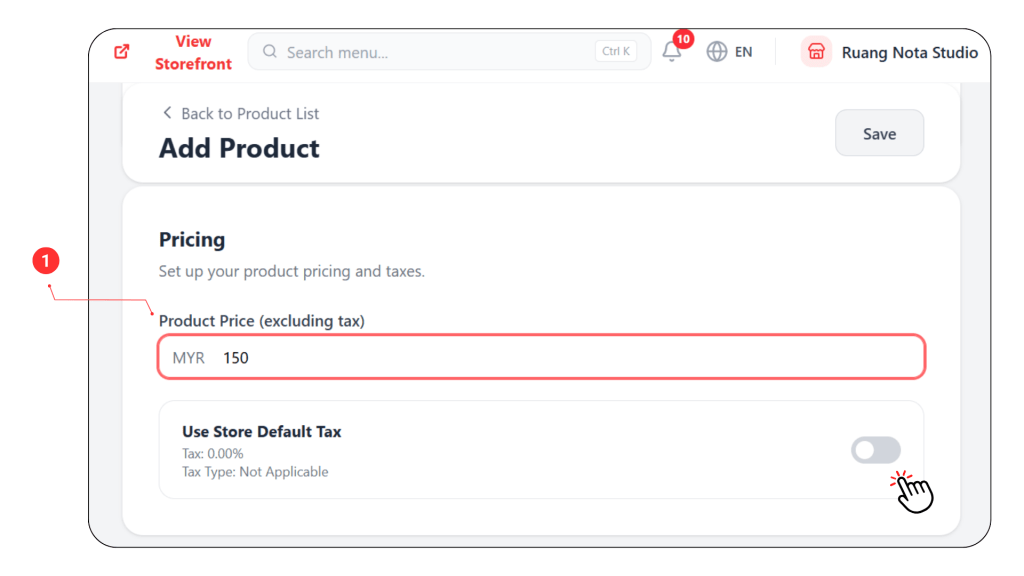
(1) Insert the product price in MYR
Use Store Default Tax: Turn on this toggle if you want the product to follow your store default tax setting.
If the product should not apply tax, leave it turned off.
STEP 5: Product Variations, Product Modifier, Product Add-On
#
Product Variations, Product Modifier, Product Add-On <– you can refer to here for more details.
If your product does not have any variations, modifier and add-ons, you may skip this section.
STEP 6 : SEO (Search Engine Optimization)
#
The SEO section helps improve how your product appears in search results.
You can add a clear title, short description, and simple product URL so customers can understand and find your product more easily online.
Search Engine Optimization will helps your product easier to find through search engines.
Here is the example
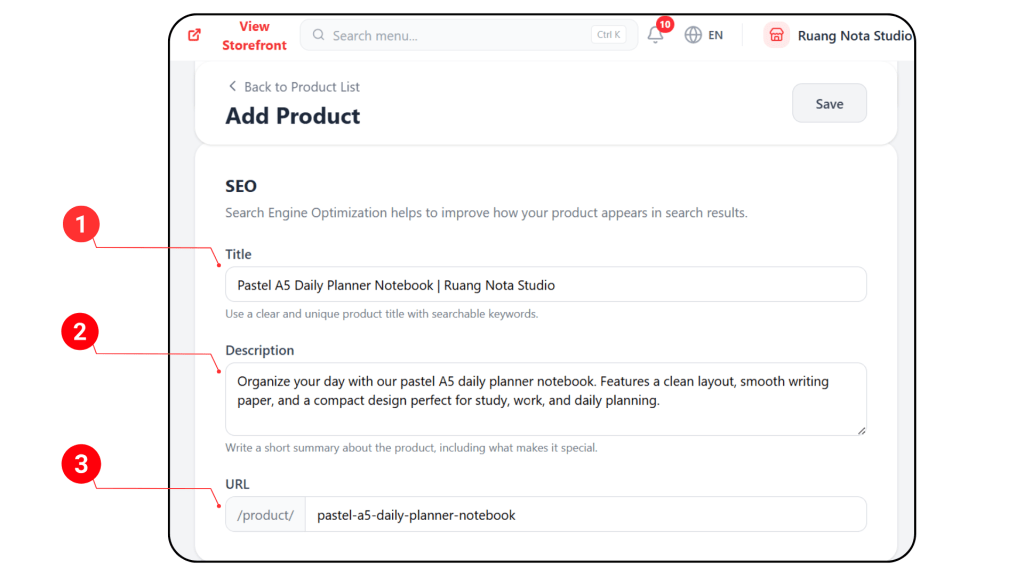
(1) Title : Enter a clear and specific product title with searchable keywords.
Use keywords such as the product type, size, color, or main purpose.
(2) Description: Write a short summary of the product, including its key features and what makes it special.
(3) URL: Create a simple and readable product URL.
Tips:
Use product name
Include important keywords
Keep it clear and simple
Avoid using symbols or unnecessary words
STEP 7: Inventory #
This section is use to manage your product stock, order quantity limit, and pre-order setting. This helps you control how many items customers can purchase and whether the product is available for normal order or pre-order.
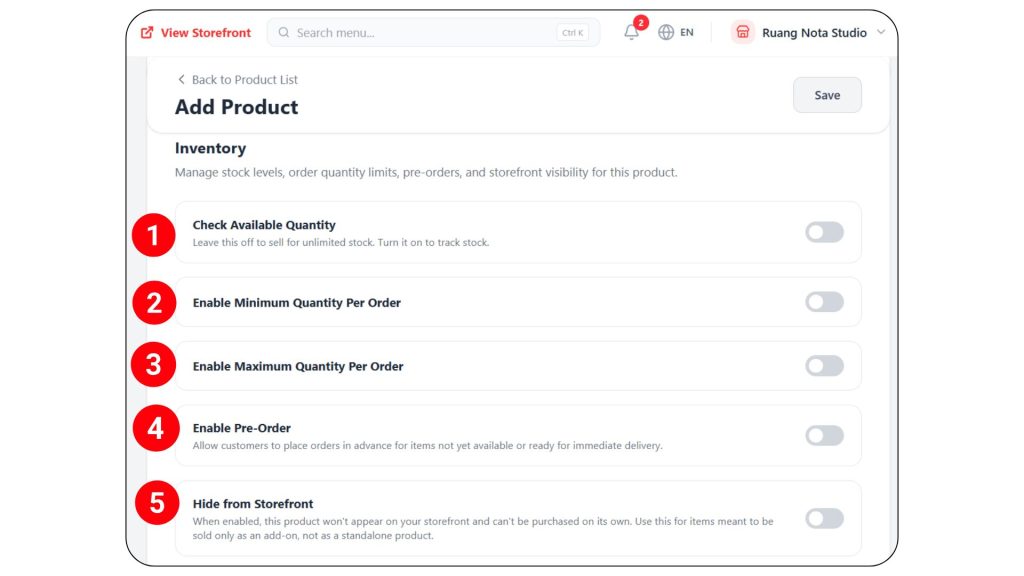
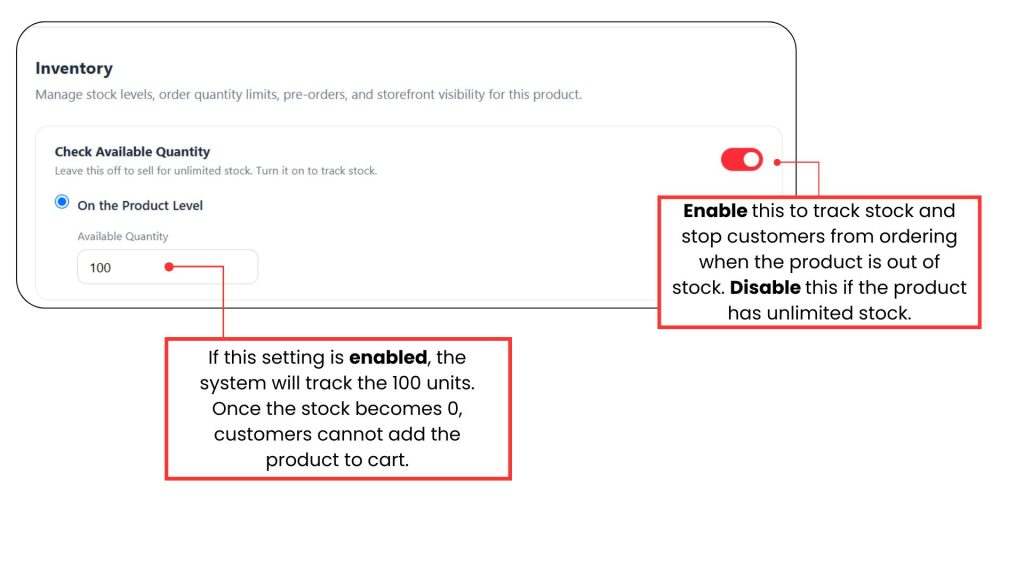
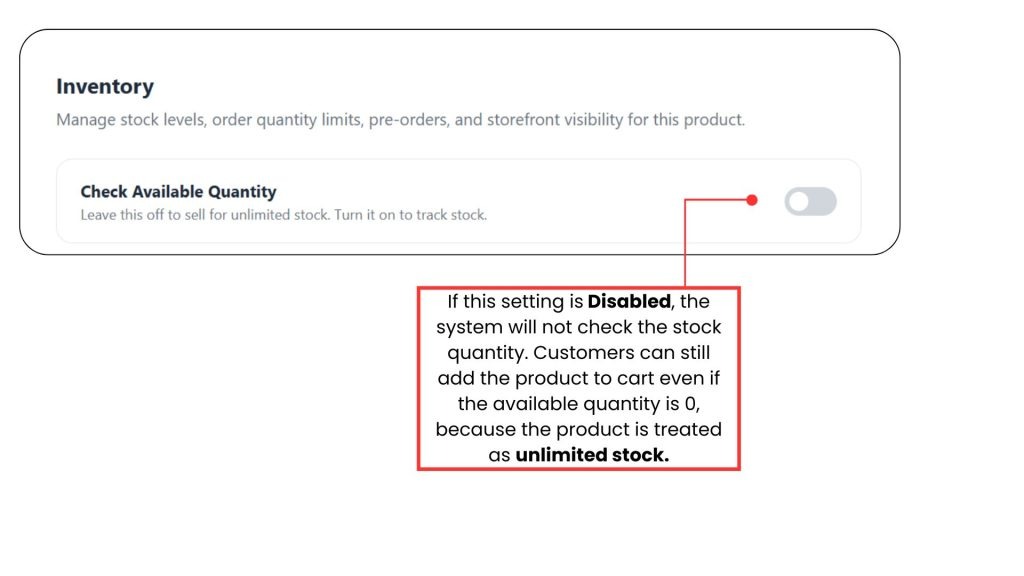
Check Available Quantity: Enable this setting if you want the system to track the available stock quantity for this product.
Enable Minimum Quantity Per Order:
- Turn this on if customers must purchase at least a certain quantity of this product in one order.
- Example: If you set the minimum quantity as 2, customers must buy at least 2 units before they can place the order.
Enable Maximum Quantity Per Order:
- Turn this on if you want to limit how many units a customer can buy in one order.
- Example: If you set the maximum quantity as 5, customers can only buy up to 5 units per order
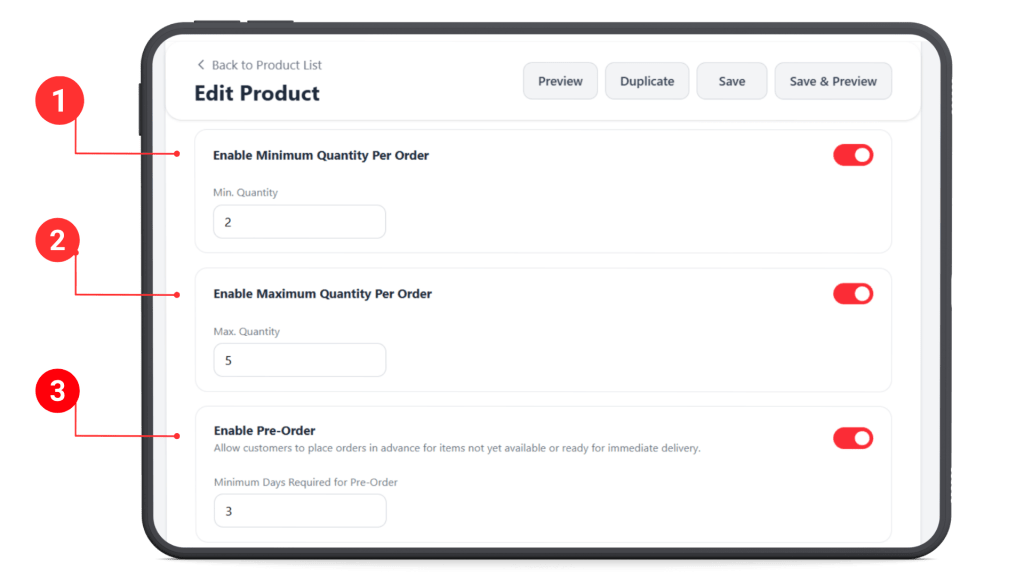
Enable Pre-Order
- Turn this on if the product is not ready for immediate delivery, but you still want customers to place orders in advance.
- Enter the minimum number of days required before the order can be fulfilled.
- Example: If you set 3 days, customers will understand that the item needs at least 3 days to be prepared before delivery or pickup.
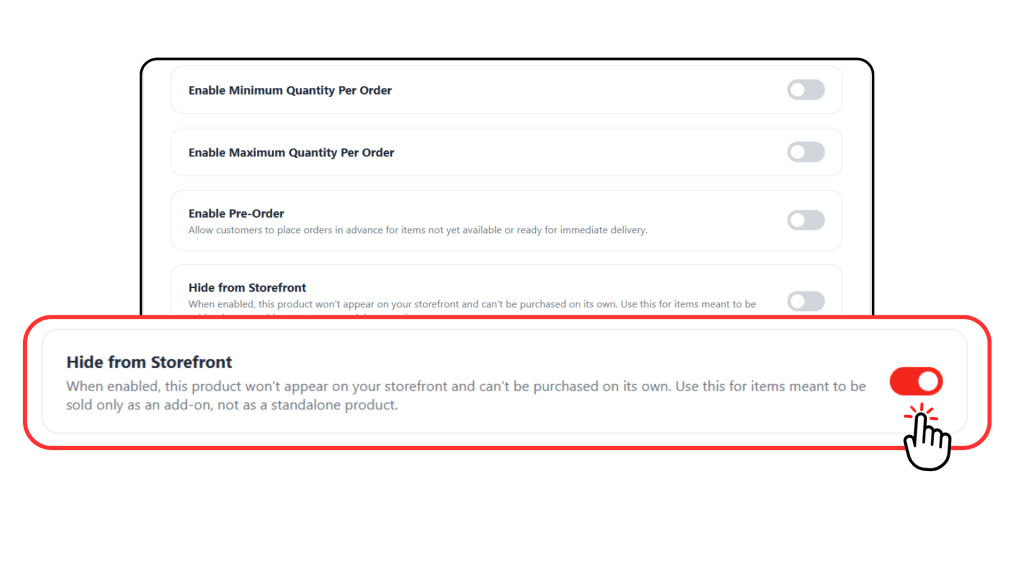
Hide from Storefront
- Turn this on if you do not want the product to appear on your storefront.
- This is useful for products that should not be sold directly, such as add-on items, free gifts, or special items that are only available together with another product.
- Example: A free gift item can be hidden from the storefront, but still used as part of a promotion or add-on.
Final Step #
After completing the inventory settings, click Save or Save & Preview to apply your changes.
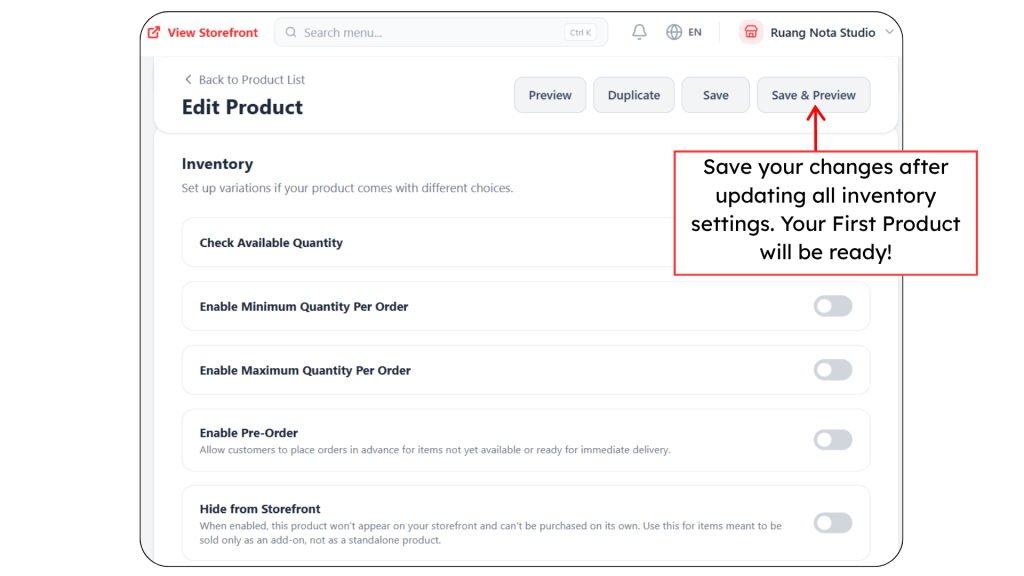
Your first product is now ready!