
The Item Purchase Limit feature allows you to limit how many units of a product a customer can purchase within a selected period.
This is useful when you want to control limited stock items, prevent bulk purchases, or make sure more customers have a chance to buy the same product.
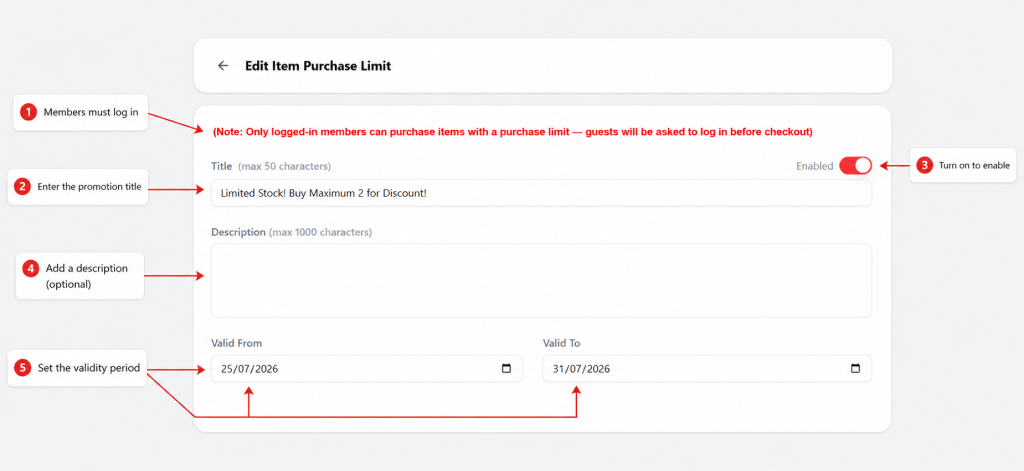
Note: Only logged-in members can purchase items with a purchase limit. Guest customers will be asked to log in before checkout.
What Customers Will See #
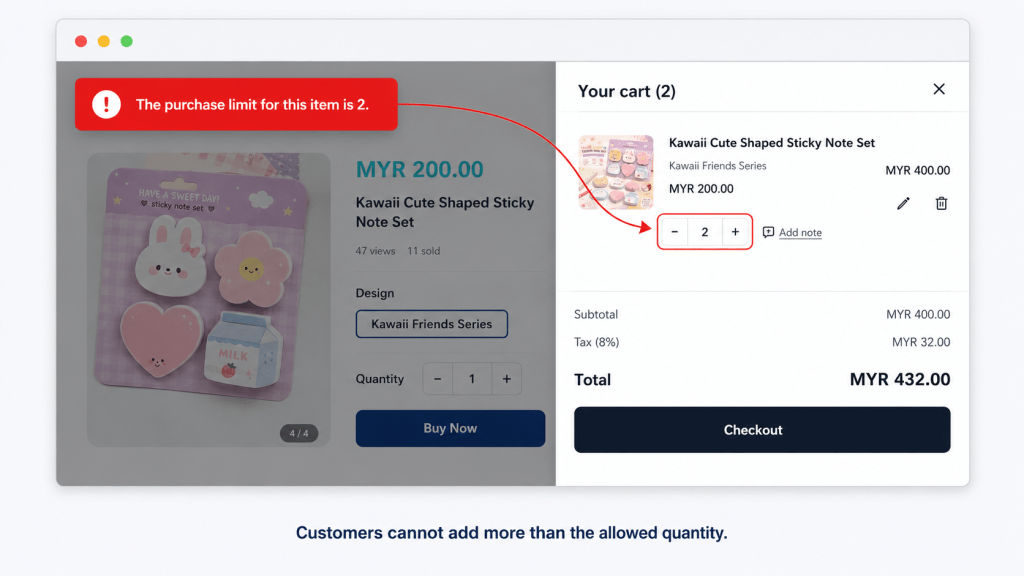
For example, you want to limit customers to purchase only 2 units of Kawaii Cute Shaped Sticky Note Set during your campaign period.
Once the limit is set, each members can only purchase up to 2 units of that product.
If the customer tries to add more than the allowed quantity, the system will display a message to inform them that the purchase limit has been reached.
Customer selects product → Limit is 3 units → Customer tries to add more → System shows purchase limit message
Set Up an Item Purchase Limit #
Go to Promotion → Item Purchase Limit, then create a new promotion.
Complete the basic details for your purchase limit:
Choose the Items and Maximum Quantity:
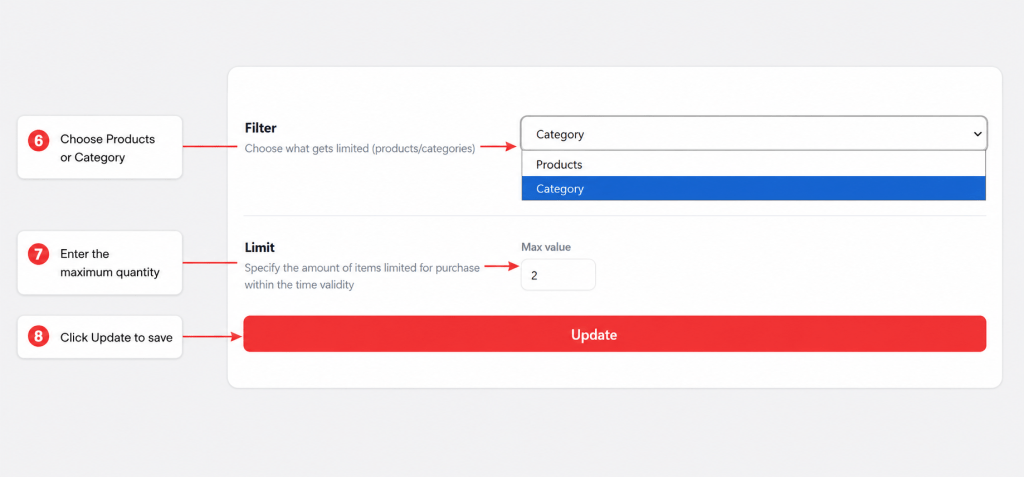
Click Update to save the purchase limit settings.
Before launching, it is recommended to test the promotion on your storefront to make sure the discount amount is correct.